Map editor
Map editor quick reference
 Doom 3
 Quake
4
Quake
4
This article describes the built-in editor that comes with all id Tech 4 games. Always check the editor specific page for the particular game you’re editing in. The map editor can be started by typing ” editor ” in the console or as a startup parameter .
Editor basics
What follows is a series of images that show various parts of the id Tech 4 engine level design software and what each feature does.
The toolbar
Most of the commands can be accessed through several ways. The two main ways are either through shortcut keys, or the toolbar. Note: You can drag the toolbar with the handle on the left just like any other toolbar.
File Operations
 Open an
existing file within the application.
Open an
existing file within the application.
 Saves the
current map. If this is the first time of saving, you will be prompted
for a new filename to be declared.
Saves the
current map. If this is the first time of saving, you will be prompted
for a new filename to be declared.
Flip & Rotate
 Flip the selected Brush/Entity/Patch over the X Axis.
Missing image: /w/images/8/89/Toolbar_x-axis_rotate.png x-axis Rotate
Rotate the selected Brush/Entity/Patch over the X Axis 90 degrees.
Missing image: /w/images/b/bf/Toolbar_y-axis_flip.png y-axis Flip
Flip the selected Brush/Entity/Patch over the Y Axis.
Missing image: /w/images/c/c7/Toolbar_y-axis_rotate.png y-axis Rotate
Rotate the selected Brush/Entity/Patch over the Y Axis 90 degrees.
 Flip the selected Brush/Entity/Patch over the Z Axis.
Missing image: /w/images/9/92/Toolbar_z-axis_rotate.png z-axis Rotate
Rotate the selected Brush/Entity/Patch over the Z Axis 90 degrees.
Selection Operations
Missing image: /w/images/c/c8/Toolbar_complete_tall.png Complete Tall
Selects everything completely inside the current brush in your current 2D view, and deletes the brush afterwards.
Missing image: /w/images/b/b2/Toolbar_select_touching.png Select Touching
Selects everything touching the current brush, and does not delete the brush afterwards.
 Selects everything inside (also incomplete)
the current brush in your current 2D view, and deletes the brush
afterwards.
Selects everything inside (also incomplete)
the current brush in your current 2D view, and deletes the brush
afterwards.
Missing image: /w/images/3/3f/Toolbar_select_inside.png Select Inside
Selects everything completely inside the current brush in the 3D view (does respect all 3 axis), and deletes the brush afterwards.
CSG Operations
Missing image: /w/images/b/b2/Toolbar_csg_substract.png CSG Substract
Subtract the selected brush (only) from any touching brushes. *
Missing image: /w/images/0/07/Toolbar_csg_merge.png CSG Merge
Any touching, selected brushes forming a convex shape are merged into a single brush.
 Converts a
solid brush into a set of brushes forming a hollow space with its outer
dimensions the size of the original brush, and a wall thickness equal to
the grid size. *
Converts a
solid brush into a set of brushes forming a hollow space with its outer
dimensions the size of the original brush, and a wall thickness equal to
the grid size. *
Missing image: /w/images/0/06/Toolbar_clipper.png Clipper
Clipper: 2 or 3 point brush clipping tool. *
View options
Missing image: /w/images/3/3b/Toolbar_change_views.png Change Views
Cycles through the available 2D views ( hotkey: CTRL + TAB ).
Missing image: /w/images/5/5d/Toolbar_texture_view_mode.png Texture view mode
Selects the texture view mode for the 3D view-port.
Missing image: /w/images/c/c7/Toolbar_cubic_clip_the_came.png Cubic clip the camera view
Cubic Clipping allows the user to limit the view distance within the 3D view-port leading to improved editor performance while working on large maps.
Rotation
Missing image: /w/images/c/c9/Toolbar_free_rotation.png Free Rotation
Let’s you freely rotate the selected objects (each on its own). Does not work with all entities.
Scaling
Missing image: /w/images/6/64/Toolbar_center_scale.png Center Scale
Center scaling allows you to adjust the scale of the selected brush, from it’s center point, equally into all four directions. *
 When
active, disallows scaling on the X axis (can be combined with Y or
Z).
When
active, disallows scaling on the X axis (can be combined with Y or
Z).
Missing image: /w/images/5/5c/Toolbar_scale_y.png Scale Y
When active, disallows scaling on the Y axis (can be combined with X or Z).
Missing image: /w/images/4/45/Toolbar_scale_z.png Scale Z
When active, disallows scaling on the Z axis (can be combined with X or Y).
Movement
Missing image: /w/images/c/c5/Toolbar_move_selection_only.png Move selection only (No Size)
Allows you to move the selected object when you click and drag outside of it (instead of resizing it).
Selection Options
Missing image: /w/images/9/99/Toolbar_only_selected_brush.png Only Selected Brushes
Disallows models to be (de-)selected, and resizing only works on selected brushes (no selected entities or models are resized).
 When active you can’t select Models with “shift clicking,” however
Selection Operations still work (see above).
When active you can’t select Models with “shift clicking,” however
Selection Operations still work (see above).
 Normally you have to “shift
click” anywhere inside a model to select it. When this is turned on, you
can click anywhere inside the surrounding bounding box. To see these
boxes, also turn on “Show primitive bounding box” below.
Normally you have to “shift
click” anywhere inside a model to select it. When this is turned on, you
can click anywhere inside the surrounding bounding box. To see these
boxes, also turn on “Show primitive bounding box” below.
Missing image: /w/images/d/d0/Toolbar_show_primitive_bbox.png Show primitive bounding box
Shows bounding box of entities and patches.
Model Options
Missing image: /w/images/8/84/Toolbar_show_models_as.png Show Models As
Selects how models are shown in the 3D view port (wireframe or skinned).
Patch Options
 Show patches as wireframes instead
of solid objects within the 3D view-port (simplifies editing where
required).
Show patches as wireframes instead
of solid objects within the 3D view-port (simplifies editing where
required).
Missing image: /w/images/7/74/Toolbar_patch_bend_mode.png Patch Bend mode
Simpler method used for bending patches (for certain situations). *
Missing image: /w/images/7/70/Toolbar_redisperse_patch_po.png Redisperse patch points
Simply re-organises the patch points so they are easier to manipulate.
Missing image: /w/images/5/5c/Toolbar_put_caps_on_current.png Put caps on the current patch
Closes any holes in the currently selected patch (to stop the player from seeing “inside” the patch)
Missing image: /w/images/1/15/Toolbar_welds_equal_patch_p.png Welds equal patch points during move
Welds patch points together where 2 patch points are located on the same grid location.
 ???
???
Light Options
Missing image: /w/images/9/95/Toolbar_show_light_volumes.png Show Light Volumes
Will show light size box for all lights even when no lights are selected.
Missing image: /w/images/1/1c/Toolbar_show_.png ???
(?)
Spline Editing
Missing image: /w/images/f/f4/Toolbar_spline_options.png Spline options
Displays options panel for use while creating and editing a spline.
Missing image: /w/images/2/2c/Toolbar_edit_curve_points.png Edit Curve Points
Enables editing of the selected spline.
 Add an extra spline point to the end of the
currently selected spline.
Add an extra spline point to the end of the
currently selected spline.
Missing image: /w/images/3/31/Toolbar_insert_curve_point.png Insert Curve Point
Insert an extra spline point in the center of the currently selected spline.
Missing image: /w/images/f/f5/Toolbar_delete_curve_point.png Delete Curve Point
Delete the currently selected spline point.
Sound Options
 Display circular area (or, volume)
that a sound covers within the game world.
Display circular area (or, volume)
that a sound covers within the game world.
Missing image: /w/images/e/e1/Toolbar_show_only_when_sele.png Show only when selected
Shows the volume of the speaker only when it’s being selected.
Game
 Switch game window to front ( hotkey: F2 ).
? = Unknown function, to be investigated and updated as soon as possible
* = Should be used with care due to problems these tools may cause with your map
The views
There are several views available while editing and creating levels using the map editor. The main view orientations are as follows:
- X/Y (Top, or birds-eye view)
- X/Z (Front view)
- Y/Z (Side, or profile view)
- Z (Vertical space (height) view)
- Cam (3D view)
Depending on how you have the editor setup, you may be interested in using the hotkey: Ctrl + TAB . This enables you to cycle through all of the 2D views within the selected viewport.
The entity inspector
Missing image: /w/images/5/58/Inspectors_entity.png The Entity Inspector
Main text areas
Entity Class combo box
This holds the class name of the entity being manipulated within the
inspector.
Create Button
This button will create a new instance of the selected entity in the
combo box.
List A
A general class description is displayed followed by available key-value
pairs for the selected entity. This information is read directly from
the definition
files . Double-clicking on one key-value will automatically set the
“Key” textbox to it.
List B
This list contains all the key-value pairs that the selected entity
currently has definied. Think of these pairs as attributes of an object.
All entities should at least have the basic attributes “classname”,
“name”, and “origin”. Each pair can be selected and modified by clicking
on it.
“Key” textbox
You may enter the name of the key you wish to set here or select one
from the list of available ones.
“Val” textbox
You may enter the value for a key here. You must have previously entered
a key name in the “Key” textbox. Click “Enter” to save the key-value
into the entity; it should now appear in area B.
“X” button
Deletes the selected key-value. You shouldn’t delete the default
attributes as this may render your entity faulty.
Entity orientation
9 numbered buttons
The buttons 45, 90, 135, 180, 225, 270, 315, 360, when clicked will
rotate the selected entity/model to face that direction (uses top
view-port). This automatically sets the key “angle” with the chosen
value.
Up/Dn buttons
Same as numbered buttons above, but sets the “angle” key to directly up
(-1) or directly down (-2).
Animation controls
Combo-box
The drop down combo-box displays all possible animations that a monster
or character has defined in its model def . The selected animation is the
default animation that the monster or character will use when triggered
within a cinematic. Automatically sets the key-value pair “anim”.
Play/Stop Buttons
When clicked, these buttons will start and stop the monster or character
animation being shown in the 3D viewport of the editor.
Frame Slider
To view any single frame of animation, you can slide the bar to the
relevant location and view the frame in the 3D viewport. While playing,
the slider will move in synch with the current frame number of the
animation being displayed.
Advanced controls
Curve Button
While working with splines, this button will allow you to choose the
type of line that you wish to use. Generally speaking, you will most
likely use a NURBS path to create a route for a func_mover to follow.
Automatically sets the key-value pair “curve_Nurbs” or
“curve_CatmullRomSpline”.
Model Button
A new browser dialog will be displayed where you are able to select any
of the models that are available (see the media inspector below for more
details on the similar functionality). The selected model will
automatically be applied to the currently selected entity. Once done,
the 3D view-port will be updated to display the new model in-place of
the previous brush entity. Automatically sets the key-value pair
“model”.
Skin Button
With this button you are able to choose the skin for the currently
selected model (if there is a choice available); see the media inspector
below for more details on the similar functionality. This is best used
for character or monster models where each model may have several skins
to choose from. For instance, “Standard Imp” has an alternate “Hell”
skin), skins are defined in skin defs . Automatically sets the key-value
pair “skin”.
Sound Button
When used with a speaker entity, you are able to go through the sounds
and sound shaders that are available; see the media inspector below for
more details on the similar functionality. The sounds inspector that
appears will allow you to sample the sound before selecting it for your
speaker entity to play. Automatically sets the key-value pair
“s_shader”.
Note:
Doom 3 only: Particle Button: When used with a
func_emitter or func_fx entity, you are able to cycle through the
available particle effects and apply one to the currently selected
entity; see the media inspector below for more details on the similar
functionality. There is a render view within the Particle Inspector that
will allow you to view the particle effect before selecting it to be
used within your map. Automatically sets the key-value pair
“model”.
Gui Button
With this, you are able to use the Gui inspector to sample all of the
Gui’s available for use; see the media inspector below for more details
on the similar functionality. Automatically sets the key-value pair
“gui”.
To access the entity inspector you can also use hotkey: N .
The media inspector
Missing image: /w/images/9/98/Inspectors_media.png The Media Inspector
This inspector is divided into two main areas: the top one serves as an assets explorer breaking down assets through their relative paths in their declarations files. The two icons in this area are the folder and the file. Selecting a file will automatically load it into memory (for instance, if it’s a texture it will become available in the texture inspector, see below). You can also load more than one asset at a time by double clicking on its parent folder; this action will load all assets in that folder and subfolders into memory. The “reload” button on top serves to reload all the declaration files again, because of a bug in the map editor you need to click the button for the inspector to load model assets. If you right click a selected asset a context menu will appear; this menu does not function properly and will crash the editor.
The bottom part of the inspector is the preview window. The four coloured lines represent the red, green, blue and alpha components of images but this feature has no effect. You can use the left and right mouse buttons to rotate and move the asset selected, respectively. For some assets like textures and guis the rotation feature is unavailable. To access the media inspector you can also use hotkey: M .
The texture inspector
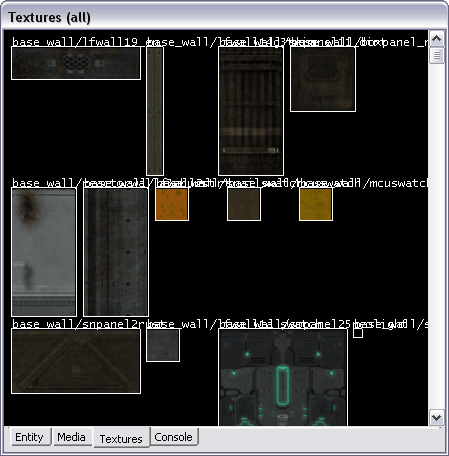
This inspector will list all the textures which are loaded into memory and available to be applied to elements of your map. Textures are loaded either automatically by loading a map and by using the media inspector. To access the texture inspector you can also use hotkey: T . Aside from the scrollbar, you can scroll the texture inspector by right-click-drag. Scrolling with the mouse wheel does not work properly and you must right-click-drag at least once for it to “kick in”.
The console inspector
Missing image: /w/images/9/96/Inspectors_console.png The console Inspector
This inspector mirrors the game’s console and most of the CVars and console commands work here too. Pressing the TAB key will display the command history. To access the console inspector you can also use hotkey: O .
Light editor
To access the light editor window press the hotkey: J or type ” editLights ” in the console.
Missing image: /w/images/d/d6/Light_editor.png The light editor
On the left you can choose between point and projected lights. A point light will affect everything inside the purple coloured parallelopiped while a projected light normally uses a pyramid. Simply put, a point light is like the Sun while projected lights behave like spotlights.
In the point light options, the “equilateral radius” setting locks the radius settings for all three axis into the same value and always get a cube-like volume. These three control the size of the purple box. The “fall-off” radio buttons don’t appear to do anything; whilst the “parallel” setting will make the light appear to be infinitely far away casting all the shadows in the same direction, simulating the Sun. If you enable the “centre” option the three text boxes on its right will become active and a small purple dot will appear in the editing window. This centre refers to the origin of the light and shadows. Usually this is the same as the origin of the affected volume but by enabling this option you can make the volume light up one area while the centre of the light is in another. You can change this centre by either dragging the purple dot in the editor view or by inserting its actual origin values here.
When you select “projected light” a second set of options becomes available while the above are disabled. The light’s volume will also change to a square pyramid with two purple dots. The nine-cell matrix controls this new volume but it’s easier to do it in the editor view window by dragging the purple dots around. If you enable the “explicit start/end points” options the volume is capped somewhere before the light’s origin and two green dots appear. You can also control the cap in the text boxes but it’s easier to drag the green control dots.
The options on the right apply to both types of light. The three options on top control optimisations you can enable. Please note that these can be overridden by the actual texture you might choose below.
The colour button allows you to pick a particular colour for the light from a palette. Finally, you can choose a specific material in the “texture” dropdown list. These will modulate the light and light volume and while some will respect the colour you pick in the palette others will override that.
- Note: Doom 3
only:
- The “brightness” slider is obsolete and doesn’t work.
- Note: Quake 4
only:
- The “detail” area allows you to set a detail value for each light. The lower the value the more likely it is to be ignored by the engine when running at lower quality settings.
The black area the dropdown list is to preview the light material currently selected. Right-click drag will move the surface around while ALT + right-click drag will move the surface closer or farther away. If you want to remove a light material you will need to delete its path and name from the “texture” list.
On the bottom the “apply” button allows you to see your current changes in the editor view windows will the “apply different” allows you to select many different lights, make them all share the colour, light material or whatever property you’ve changed leaving everything else intact.
Surface inspector
To access this inspector press the hotkey: S .
Missing image: /w/images/5/53/Surface_inspector.png The surface inspector
This is where you can modify the texturing (and complexity in case of a patch ) of a particular surface. The textbox on top shows the material of the currently selected surface. The following two dials allow you to shift a texture x units in any direction while the “rotate” one allows you to rotate the texture around a rotating axis located in the centre of the surface.
Next come the scaling options that allow you stretch or shrink a texture in a particular direction. Enabling the “absolute” option makes any values on the right boxes ignore any previous scaling values.
The “fit” button scales the texture enough to fit the particular surface perfectly. The “width” and “height” values control how many times a texture should fit in that surface. The “cap” button is most useful for aligning textures in capped patches while “natural” will revert all scaling/rotation changes to that surface. The two flip buttons allows you to mirror a texture along the respective axis.
Finally if you are selecting a patch and enable the “subdivide patch” option you can then control how complex that patch is with the slider. More subdivisions means higher quality but lower performance.
- Note: Doom 3
only:
- The “texture tool goes here” area of the inspector doesn’t work.