rich_is_bored@Posted: Fri May 28, 2004 4:19 pm : More often than not, texture artists choose to use digital cameras or scanners to extract textures from real world objects. Until games started using dynamic lighting this method had it's merits because all a texture's information (diffuse, color, specularity ect) was usually stored in a single image.
Now that more and more games are starting to utilize dynamic lighting, materials in games are starting to resemble those used in modeling packages, where a texture is composed of multiple maps.
Some of these maps can still be constructed by manipulating a photo but most will need to be drawn by hand. One example is the bump map.
This can sometimes prove to be tedious because it can be hard to visualize what the relief of a surface would look like. Would you know how to draw a bump map if you hadn't seen an example before?
There are some methods of extracting semi-usable bump maps from real world surfaces. The problem is that regardless what method you use, the light source is not directly above or uniform across the surface. Because the surface is not lit head on, the bumpmap is not accurate.
For example, In the case of a flatbed scanner there is a flourecent tube and a capture device. But these objects don't share the same space and therefore the resulting scan is slightly top or bottom lit.
What strikes me as odd is there are tons of premade textures, including bumpmaps, created using photosource for sale. These people couldn't have possibly drawn all the bumpmaps and even if they did, why should anyone have to pay someone else for something they should be able to produce themselves for free.
Just out of bordom, I've been trying to figure out a way to composite two scans using photoshop. It's proven more difficult than I originally thought.
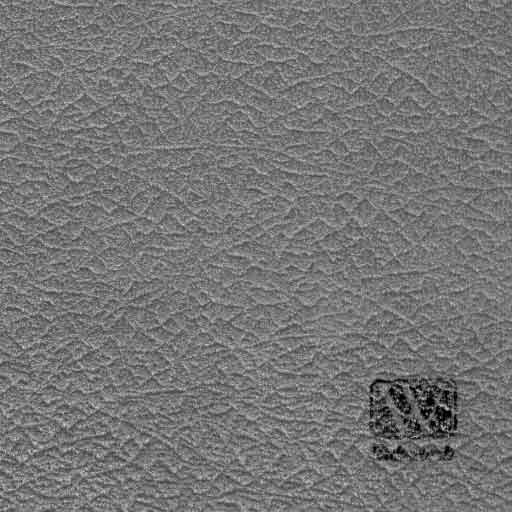
Both scans need a reference point, i.e. there needs to be an easily identifiable point on each image so that they can be lined up. In the example below I scanned a vinyl bookcover with a logo in the corner twice. Once with the book rightside up and again upside down. This way the light is either coming from above or below.
Here are the two images...
Top Lit
 Bottom Lit
This is open for anyone who wants to attempt it and you are not limited to using my source images.
der_ton@Posted: Fri May 28, 2004 4:31 pm : Mathematically speaking, these two images contain information about the gradients in y-direction (the green channel of a localmap). I think there is an easy way to extract that info. You could do it without writing a program, but with Photoshop or something like that.
I even think that one scan would be enough to extract that.
To get the other gradient, you would have to turn the book around 90 degrees and scan it once more.
The gradient is directly related to the brightness of a pixel, maybe it's even ok to just convert the grey image to a green image, and the 90deg rotatated scan to a red image, and then add the two.
The third channel of a localmap is just the z-direction, which can be calculated with B = sqr(1 - R^2 - G^2), maybe there is some way in Photoshop to do that too.
edit: the simple method i just described is a little too simple, it works only with surfaces that have no diffuse variety (your image has this black logo, which would cause the method not to work for these pixels, for example).
To get better results, it is indeed necessary to have a scans of every direction (0 and 180 degree scan, and 90 and 270 degree scan).
To get the gradient at a certain pixel, you compare the two brightness values to each other and thus get rid of the brightness bias introduced by the diffuse color of that pixel.
It's only a rough sketch of the method I have in mind.
I think I read something similar a while ago, in some article on the web.
rich_is_bored@Posted: Fri May 28, 2004 7:14 pm : Thanks for the push in the right direction. I think I have a method figured out now.
Here is a good site that explains all the blend modes in Photoshop and then some...
http://www.pegtop.net/delphi/blendmodes/
Based off what I read there, and the suggestion you made I've come up with this...

And now for the method.
First, I taped off a square section of the surface. It's not important to get a perfect square as that can be fixed in Photoshop fairly easy. It's more less just so I have reference points so that I can properly line up each scan.
I also placed a small piece of tape at the top of the book so that I could determine the orientation and which direction the light would be coming from.
Next, I scanned the surface four times. Each time I rotated the surface 90 degrees. This produces the four images each with the light projected from a different direction.
I loaded each image into Photoshop and placed them on separate layers. I then labeled each layer appropriately.(Left, Right, Up, and Down)
I rotated each layer 90+ degrees so the tape was at the top.
I desaturated each layer to leave me with greyscale images.
I placed guides at the taped marked corners for one layer. I used the UP layer. This layer would serve as the basis for correcting any perspective errors.
I used Transform > Distort to adjust each of the remaining layers so that all the corners lined up correctly. Now the images were ready to composite.
By setting the opacity of a layer to 50% it will produce the same result as an average.
Formula: f(a,b) = (a + b) / 2
*
a represents the base layer.
b represents the blend layer.*
I averaged the Up and Down layers to produce a greyscale that represents the surface relief on the Y axis.
I averaged the Left and Right layers to produce a greyscale that represents the surface relief on the X axis.
Finally, I averaged the X and Y axis layers to produce a greyscale that represents the surface relief as a whole.
At this point the image could be cropped and then made seamless using standard techniques. A normal map could be created from this by using the normal map filter.
der_ton@Posted: Fri May 28, 2004 7:52 pm : That was alot less painfull than what I came up with.

Could you please send me the 4 images (the rotated and corrected ones, but before converting to greyscale), so I can try my method? I think I'll write a little program that takes these 4 images and outputs the normalmap and the "unlit" diffusemap.
rich_is_bored@Posted: Fri May 28, 2004 8:42 pm : I sent them in a RAR file as compressed as possible. The file is about 5 MB. I saved the images in TGA format and the resolution is kinda big but it's all in an attempt to keep the quality top notch.
Give me a heads up when and if you get the file so I can determine if I need to reduce the size either by changing the format, reducing the resolution or both.
der_ton@Posted: Fri May 28, 2004 10:27 pm : Thanks I got them.
Lossless PNG compression would have been an option too, but I think the RAR compression did a good job anyway.
ssj3alan@Posted: Sat May 29, 2004 10:28 am : My Scanner is going to hate you after this one rich_is_bored. YOUR MAKING IT WORK TO HARD. LOL. this is cool I am going to try out your method on different things and see what I come up with.
Thanks
Petter@Posted: Sat May 29, 2004 5:44 pm : Eum!
1:photoshop/Image/Adjustments/Desaturate "making things gray"
2:photoshop/Filter/Stylice/Emboss (costum bar adjustments)
3:ctrl+I (to invert black to white and white to black)
Is this not what we are trying to do here?
http://petter.highone.nu/quest.jpg
EDITED:
Ahaaa, Nevermind!
der_ton@Posted: Sat May 29, 2004 7:32 pm : Petter wrote:
Is this not what we are trying to do here?
No. We're trying to get a real, accurate bumpmap from an uneven surface, where the bumpmap represents the unevenness of the scanned surface.
Petter@Posted: Sun May 30, 2004 10:09 am : Yeah I figured after a few times reading through!

Real nice stuff Rich, der_ton!
kat@Posted: Sun May 30, 2004 5:51 pm : hmmm.. intersting... *puts thinking cap on*
[EDIT] sometime later
Ok I tried something out with regards to this as a couple of potential problems pooped into my head as I read the info above...
A: you'd need to have access to the original photo in order to do the scans
B: having to move the photo does introduce the possibility of mismatching the 4 images when you layer them.
... so I tried something based on one of my current textures : 256x256 that I think approximates the process described above when access to an original (real) photo for scanning isn't available
the original texture - this was originally a photograph that had already been worked on to make it tile-able for ingame use. It's also had a bit of high-pass sharpening

converted to grey scale (24bit RGB) - a bit of high-pass to flatten it a bit so the contrast isn't quite so high

used the emboss filter set to a reasonably low setting and at the following angles, 90, 180, 270, 360 (0) to corrispond top the 'top', 'bottom', 'left' & 'right' scan
90º

270º

180º

360º

Each of the 'angled' embossed versions were copied in to a layered image and then merged together once they had been merge-mode blended as 'Hard Light' (note the background colour was mid grey and layers were blended to that - you get different results depending on the background colour and if you merge each layer to the 1st layer instead of the background)

Overall the quality is a bit duff coz the texture is small for something with this much detailing, should ideally be 512x512 min.
Qwertys@Posted: Sun May 30, 2004 6:50 pm : interesting, but you do need to remove shadowing detail from the original image so when its combined it comes out right.
i didnt know you could do different angles with the emboss filter... do you just rotate the entire canvas?
kat@Posted: Sun May 30, 2004 7:04 pm : Qwertys wrote:
interesting, but you do need to remove shadowing detail from the original image so when its combined it comes out right.
Relative to what?? It's a texture of a ground surface covered in pebbles so it's going to have lots of darks besides, combining the images means you combine the tones and colours (greyscales) together to get an
averaged value which is basically what's being approximated. If the 'shadows' are too dark you just need to alter the tone/saturation/contrast.. etc.. to compensate (besides you're looking at crappy quality highly compressed jpgs so they
are a bit naff. The point was to show a workable process)
Quote:
i didnt know you could do different angles with the emboss filter... do you just rotate the entire canvas?
I should have mentioned this stuff was done in CorelPhotoPaint 9 which has a 'angle' gizmo that allows you to set the angle of the light relative to the original. You can also change the colour the image is embossed to (greyscale in this case).
obihb@Posted: Sun May 30, 2004 7:48 pm : Qwertys... you can emboss with any light direction in Photoshop.
Qwertys@Posted: Sun May 30, 2004 10:44 pm : ok, i made a macro in photoshop that should do all this automatically. when it completes, you'll have 4 layers, each embossed in the proper directions and blended with hard light. if anyone wants the macro tell me and i'll email it to you so you can check it out.
mac@Posted: Mon May 31, 2004 12:34 am : hmmm somehow this doesnt look right

kat@Posted: Mon May 31, 2004 12:43 am : Well considering what's actually being done here it won't, especially when compaired to proper bumps generated from 3D objects. It's pretty much an approximation that needs testing ingame to check it's validity as it may produce some 'passable' results that most peeps may not even notice in given ingame situations...!
bb_matt@Posted: Mon May 31, 2004 5:47 am : I've been following this thread with interest and trying to figure a few things out.
Personally, I think the quality of the artists working on a title like Doom3 would indicate that they would work from photosource, but recreate a texture from scratch based on that photosource to remove unneccessary light data. Exactly how far they would go with it, I don't know. For instance, in the case of a leather texture, would they create a 3d model of it and then get the bump map data from that ? - or would they wing-it and just paint it ?
After all, if an artist can paint a realistic looking skin for a model, painting flat textures is not going to be that difficult.
Certainly, for lesser artists, painting textures with bumpmap data in mind is not something that will come easily.
But a leather book like the one in rich_is_bored's initial scanner test wouldn't be that difficult to create from scratch in photoshop - heck, you can make your life easier by using plugin-filters. If I get time this week, I'll put my money where my mouth is and attempt to create a realistic looking leather texture with bump map from scratch, using photosource as a reference.
Qwertys@Posted: Mon May 31, 2004 8:33 am : hmm, well i'll take that up a notch matt. I'll show you a texture, and you determine what the source is.
7318@Posted: Mon May 31, 2004 8:03 pm : hm what a great technique.. KAT you saved my life

i was so worried about the methout to get textures done