BloodRayne@Posted: Sat Aug 04, 2012 2:53 pm : It's stuff like this that's always a little unsettling. Here I am, minding my own business, imagining what purgatory/hell might look like.
I finish up my map, BSP it and here's the endresult:

I am superstitious, so I'm going back in to add another cluster lol.
Sikkpin@Posted: Sat Aug 04, 2012 9:15 pm : Here you go. If you have any questions about the parameters or you want any modifications, let me know. Shader, material and non-Doom 3 textures included. It's an opaque surface and the shader is quite simple so it can be used liberally. The screenshot doesn't do it justice so be sure to check it out in real time

.

BloodRayne@Posted: Sat Aug 04, 2012 9:28 pm : Ahhh great! Really gorgeous. Going to work it in right away.

bladeghost@Posted: Sat Aug 04, 2012 9:42 pm : wow that's really cool, no pun there... as I have a heck of a time just making a decent sheet of glass. very very nice!
Sikkpin@Posted: Sat Aug 04, 2012 10:52 pm : There's a slight fuck up in the shader I included in the rar. I was doing the parallax effect in the wrong space. Hardly noticeable but still incorrect so you'll want to use the shader below. Sorry about that.
Code:
!!ARBvp1.0
OPTION ARB_position_invariant;
# input:
#-----------------------------------------
# texcoord[0] = TEX0 texcoords
# attrib[9] = tangent[0]
# attrib[10] = tangent[1]
# attrib[11] = normal
#
# env[5] = localViewOrigin
# env[6] = modelMatrix[0]
# env[7] = modelMatrix[1]
# env[8] = modelMatrix[2]
#
# local[0] = detail scale, detail strength
# local[1] = height scale, height bias, refraction strength, Fresnel exponent
# local[2] = reflection color
# local[3] = refraction color
#
# output:
#-----------------------------------------
# texCoord[0] = normal/detail map texcoord
# texCoord[1] = surface tangent to global coordiantes, w = world view vec X
# texCoord[2] = surface bitangent to global coordiantes, w = world view vec Y
# texCoord[3] = surface normal to global coordiantes, w = world view vec Z
# texCoord[4] = tangent-space view vector
# texCoord[5] = height scale, detail strength, refraction strength, Fresnel exponent
# texCoord[6] = reflection color
# texCoord[7] = refraction color
PARAM vec = { 1.0, 0.0, 0.0, 1.0 };
PARAM iceParms = program.local[0];
PARAM iceParms2 = program.local[1];
TEMP R0, R1;
# surface texture coordinates
MOV R0, 1.0;
MOV R0.zw, iceParms.x;
MUL result.texcoord[0], vertex.texcoord[0].xyxy, R0;
# tangent space -> world space conversion matrix
DP3 result.texcoord[1].x, vertex.attrib[9], program.env[6];
DP3 result.texcoord[1].y, vertex.attrib[10], program.env[6];
DP3 result.texcoord[1].z, vertex.normal, program.env[6];
DP3 result.texcoord[2].x, vertex.attrib[9], program.env[7];
DP3 result.texcoord[2].y, vertex.attrib[10], program.env[7];
DP3 result.texcoord[2].z, vertex.normal, program.env[7];
DP3 result.texcoord[3].x, vertex.attrib[9], program.env[8];
DP3 result.texcoord[3].y, vertex.attrib[10], program.env[8];
DP3 result.texcoord[3].z, vertex.normal, program.env[8];
# transform view vector to world-space
ADD R0, program.env[5], -vertex.position;
DP3 result.texcoord[1].w, R0, program.env[6];
DP3 result.texcoord[2].w, R0, program.env[7];
DP3 result.texcoord[3].w, R0, program.env[8];
# transform view vector to tangent-space
DP3 result.texcoord[4].x, R0, vertex.attrib[9];
DP3 result.texcoord[4].y, R0, vertex.attrib[10];
DP3 result.texcoord[4].z, R0, vertex.normal;
# deform magnitude and scales it by the projection distance
MOV R0, vec;
DP4 R0.z, vertex.position, state.matrix.modelview.row[2];
DP4 R1.x, R0, state.matrix.projection.row[0];
DP4 R1.y, R0, state.matrix.projection.row[3];
# don't let the recip get near zero for polygons that cross the view plane
MAX R1.y, R1.y, 1.0;
RCP R1.y, R1.y;
MUL R1.x, R1.x, R1.y;
# clamp the distance so the deformations don't get too wacky near the view
MIN R1.x, R1.x, 0.02;
# ice parameters
MOV result.texcoord[5].x, iceParms.y;
MOV result.texcoord[5].y, iceParms2.x;
MUL result.texcoord[5].z, R1.x, iceParms2.y;
MOV result.texcoord[5].w, iceParms2.z;
# reflection color
MOV result.texcoord[6], program.local[2];
# refraction color
MOV result.texcoord[7], program.local[3];
END
#==================================================================================
!!ARBfp1.0
OPTION ARB_precision_hint_fastest;
# texture 0 = surface normal map
# texture 1 = surface detail normal map
# texture 2 = reflection map
# texture 3 = refraction map
# texture 4 = Fresnel color shift map
#
# env[0] = 1.0 to _currentRender conversion
# env[1] = fragment.position to 0.0 - 1.0 conversion
OUTPUT oColor = result.color;
ATTRIB fPos = fragment.position;
ATTRIB TC = fragment.texcoord[0];
ATTRIB tangent = fragment.texcoord[1];
ATTRIB bitangent = fragment.texcoord[2];
ATTRIB normal = fragment.texcoord[3];
ATTRIB viewVecTC = fragment.texcoord[4];
ATTRIB iceParms = fragment.texcoord[5];
ATTRIB reflectCol = fragment.texcoord[6];
ATTRIB refractCol = fragment.texcoord[7];
PARAM nonPoT = program.env[0];
PARAM invRes = program.env[1];
TEMP uv, viewVec, wViewVec, normalVec, wNormalVec, reflectVec;
TEMP NdotV, color, diffuse, specular, fresnel, detail;
TEMP R0, R1;
# load the normal map and scale to -1.0<->1.0 range
TEX normalVec, TC, texture[0], 2D;
MAD normalVec, normalVec.wyzx, 2.0, -1.0;
# load the detail normal map and scale to -1.0<->1.0 range
TEX detail, TC.zwzw, texture[1], 2D;
MAD detail, detail.wyzx, 2.0, -1.0;
# add detail normal
MAD normalVec.xy, detail, iceParms.x, normalVec;
# transform the surface normal by the local tangent space
DP3 wNormalVec.x, normalVec, tangent;
DP3 wNormalVec.y, normalVec, bitangent;
DP3 wNormalVec.z, normalVec, normal;
# normalize world-space normal vector
DP3 wNormalVec.w, wNormalVec, wNormalVec;
RSQ wNormalVec.w, wNormalVec.w;
MUL wNormalVec.xyz, wNormalVec, wNormalVec.w;
# normalize the world-space view vector
MOV wViewVec.x, tangent.w;
MOV wViewVec.y, bitangent.w;
MOV wViewVec.z, normal.w;
DP3 wViewVec.w, wViewVec, wViewVec;
RSQ wViewVec.w, wViewVec.w;
MUL wViewVec.xyz, wViewVec, wViewVec.w;
# normalize the tangent-space view vector
DP3 viewVec.w, viewVecTC, viewVecTC;
RSQ viewVec.w, viewVec.w;
MUL viewVec.xyz, viewVecTC, viewVec.w;
# calculate Fresnel
DP3 NdotV, wNormalVec, wViewVec;
ADD_SAT NdotV.y, 1.0, -NdotV;
POW_SAT fresnel, NdotV.y, iceParms.w;
# calculate specular
MUL reflectVec, NdotV.x, wNormalVec;
MAD reflectVec.xyz, reflectVec, 2.0, -wViewVec;
TEX specular, reflectVec, texture[2], CUBE;
LRP specular, fresnel, reflectCol, specular;
# calculate sub-surface diffuse
TEX R1, TC, texture[3], 2D;
ADD R1.w, 1.0, -R1.w;
MUL R1.w, R1.w, -iceParms.y;
MAD R1.xy, R1.w, viewVec.xyxy, TC;
MAD R1.xy, iceParms.z, normalVec.xyxy, R1;
TEX diffuse, R1, texture[3], 2D;
MAD diffuse.x, diffuse.x, 0.9, 0.05;
MOV diffuse.y, 0.5;
TEX diffuse.xyz, diffuse, texture[4], 2D;
MUL diffuse.xyz, diffuse, refractCol;
# add diffuse and specular and output
ADD oColor.xyz, diffuse, specular;
END
BloodRayne@Posted: Mon Aug 06, 2012 7:33 pm : I've implemented it into my own testmap but I'm getting some weird results, let me know if you need more info (and what kind!
)
[edit: never mind I f3ked up]
[edit2: ok I f3ked up, fixed it but still have a weird issue..
]
It works but it seems very bright, anything I can do to tone that down?
Code:
textures/vincere/sikk_ice
{
noShadows
noSelfShadow
qer_editorimage textures/vincere/vin_rock1_d.tga
{
program ice.vfp
vertexparm 0 16, 0.1 // detail scale, detail strength
vertexparm 1 0.15, 4.0, 3.0 // height scale, refraction strength, Fresnel exponent
vertexparm 2 0.5, 0.5, 0.56, 1.0 // reflection color
vertexparm 3 0.6, 0.6, 0.66, 1.0 // refraction color
fragmentmap 0 textures/vincere/vin_rock1_d.tga // surface normal map
fragmentmap 1 textures/vincere/ice/detail1.tga // surface detail normal map
fragmentmap 2 cubeMap env/vin_gen1 // reflection map (this is about twice as dark as the vanilla gen1)
fragmentmap 3 textures/vincere/ice/perlin_noise // refraction map (needs height map in alpha)
fragmentmap 4 textures/vincere/ice/ice_gradient // Fresnel color shift map
}
}
Attachment:
 vin_rock1_d.jpg [ 152.38 KB | Viewed 92 times ]
Attachment:
 shot00124.jpg [ 253.94 KB | Viewed 103 times ]
Sikkpin@Posted: Mon Aug 06, 2012 7:53 pm : Looks like you're using a diffuse texture instead of a normal map for texture 0.
BloodRayne@Posted: Mon Aug 06, 2012 8:13 pm : Yup, I'm a dumbass, thanks!
Ok it looks better now, but still very bright, anyway to tone it down more? Or is there still something wrong with the shader?
Attachment:
 shot00126.jpg [ 252.92 KB | Viewed 133 times ]
Sikkpin@Posted: Mon Aug 06, 2012 8:56 pm : Try using darker colors for these:
Code:
vertexparm 2 0.5, 0.5, 0.56, 1.0 // reflection color
vertexparm 3 0.6, 0.6, 0.66, 1.0 // refraction color
Also, disable ldr bloom if you're using it in conjunction with the hdr bloom. That's essentially double the bloom and the ldr one doesn't give a shit about adapted luminance or thresholds.
BloodRayne@Posted: Mon Aug 06, 2012 9:29 pm : Yes, now it's behaving exactly the way I want it to.
Attachment:
 shot.jpg [ 313.08 KB | Viewed 152 times ]
I would like to request one more functionality for it, though..
This would be even better if I could add a mask layer to it (where black would be invisible, white would be fully visible and anything in between) so I could also add this effect as ice decals to the walls and certain objects. I could also make variants on the material for a more frozen snow effect.
Attachment:
 Frozenwall2.jpg [ 42.59 KB | Viewed 101 times ]
bladeghost@Posted: Tue Aug 07, 2012 2:34 am : for textures that get that 'add diffuse to make it bright in the .MTR , what I've done is just un-brighten the texture in photoshop by reducing its brightness and it will light up properly after once darkened.. in short just make your lit texture darker and it seems to balance out. I haven't seen a variable for that but that seems to be a good working method. example: the holo table in my mod needs to be seeable not blinding... so just by darknening the texture when its 'lit in the materials with the 'add line, that can be something to consider, my observation while working on things like that at times... thought I'd share that.
bladeghost@Posted: Tue Aug 07, 2012 2:39 am : BloodRayne wrote:
Yes, now it's behaving exactly the way I want it to.
yikes, that ice could look better, some spikes maybe? as it was formed with gravity? icy stalagtites perhaps, just a suggestion....cool stuff! yeah man!

BloodRayne@Posted: Tue Aug 07, 2012 9:25 am : bladeghost wrote:
for textures that get that 'add diffuse to make it bright in the .MTR , what I've done is just un-brighten the texture in photoshop by reducing its brightness and it will light up properly after once darkened.. in short just make your lit texture darker and it seems to balance out. I haven't seen a variable for that but that seems to be a good working method. example: the holo table in my mod needs to be seeable not blinding... so just by darknening the texture when its 'lit in the materials with the 'add line, that can be something to consider, my observation while working on things like that at times... thought I'd share that.
This is an opaque shader so if I place it as a decal over e.g. a wall then it will completely obscure the wall.
I want to make the walls look 'frozen' by using this shader in abundance as a decal, meaning I need to have a translucent mask I can add to it so the textures below it will shine through.
ps: That's just a testmodel and testmap lol!

marcelus@Posted: Tue Aug 07, 2012 10:27 am : very nice mod. I started to play yesterday. Great music and great gameplay. Maybe the game could be in some parts a little lighter but it is irrelevant. Looking forward to the second hub
BloodRayne@Posted: Tue Aug 07, 2012 11:14 am : Thanks, marcelus.
This Sunday I'll be releasing an update to the game with many new assets, updates and an extra map so look out for that.
BloodRayne@Posted: Sat Aug 11, 2012 7:38 pm : The second release is shaping up nicely. I'm currently in last minute play-testing and debugging with no real issues so far. Meaning... the release is ready for tomorrow, planned and ready to go!
Most of the work is currently going into testing the balance between difficulty modes and sniffing out small stuff like z-fighting in areas etc..etc.. Then late tonight it will be a matter of creating the final release, package and upload it then hope that MODDB approves it as soon as possible!
Are you ready?
bkt@Posted: Sun Aug 12, 2012 4:09 am : Hell to the yeah!
BloodRayne@Posted: Mon Jul 16, 2012 8:20 pm : So... anybody been waiting for this or... no?
It's been a while since the last update!
I was saving all this goodness up till I had new things to show... and boy do I have new things to show!
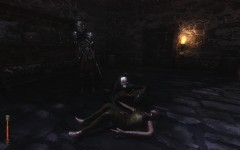
Two new enemies and lots of finalized areas coming up in a huge screenshot update that was made to the images section.

I have been working on updating and adding the final detail layers to the maps that were released. All other maps are now somewhat in a playable state. I've added some pretty cool stuff to the game which has helped development. One of the things I've done is to add randomization scripts to all breakable objects. This gives me a lot of speed with mapping as I can just slap two entities all over the place and the game decides what to place there on it's own accord. Goodies are spawned depending on the players inventory, meaning that spikes for the stingstaff won't be given until the the player actually has the Stingstaff.
Ok. First up we have this bad guy.
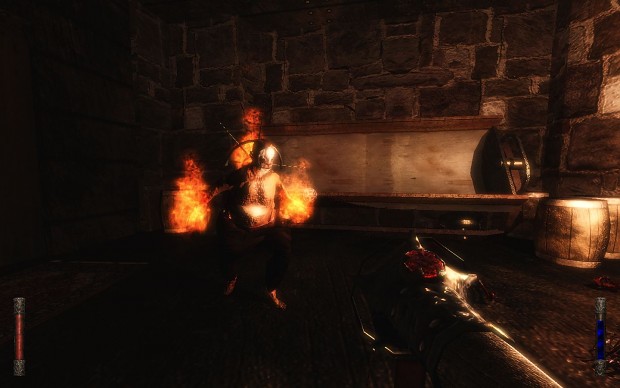
He shoots what you could best describe as land-mines. They tick to make their presence known. But that's not comforting or helpful. It just tells you that you need to get out fast.
The Ventril enemy (can be considered the main cannon fodder in the game) has also been redone from scratch. The initial idea was always to use organic enemies, the skeletons were just placeholders, and with these new enemies the games' true colour are beginning to show, finally.
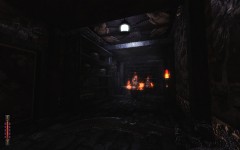
Most areas of the second map, especially the trainrails part has been extensively detailed and finished up, and I finally got around to placing some decent decals and the vines you would expect in a deep underground tunnel.
You will find screenshots of these, and other areas in the media section, so check it out now! Then last, but certainly not least: The second release of Grimm which will be released on the 11th of August!
 More interesting stuff for you guys 'modders' to know, all of this was done with
scripting only:
- I've implemented a generic system where the last player location was saved prior to a huge fall so he gets returned to his prior position (ala 'platform gameplay'). So the player doesn't die any more, resetting the map etc..
- I've implemented a crude but robust and functional 'item inventory system' where the player can have one or more items in his/her possession and use them at will.
- I've further balanced gameplay and weapon balance, making the game more enjoyable and a little less frustrating.
- I've completely replaced the old monsters for the Ventril and the Purgatory Knight
- I've added lots of tweaks in the difficulty settings.
--- Items are now spawned according to gameplay difficulty
--- Creatures now scale in damage and health according to difficulty
--- All traps that are viable now react to difficulty settings
- All settings in the game and stats, such which inventory the user has is saved in the persistant args.
solarsplace@Posted: Mon Jul 16, 2012 9:04 pm : Was thinking about this just today!
Great to see the new media. It all looks very very good. Really like this:
http://www.moddb.com/mods/grimm-quest-f ... 8#imageboxKeep up the good work!
Cheers
BTW:- where is that crossbow

- only joking btw! - we have our own Doomguy hands now too so will need a completely new one.
Sebultura@Posted: Mon Jul 16, 2012 9:07 pm : Hey ! Those are sexy screenshots for sure

Mod added to my track list under Moddb right now !
BloodRayne@Posted: Mon Jul 16, 2012 9:19 pm : Thanks guys, it's great to see you like it.

Oh and 0.0% Doom 3 assets in those shots, except for the character rigs and animations, still working on that (!)
BloodRayne@Posted: Tue Jul 17, 2012 11:05 am : It got picked up by some gaming sites.
Quote:
Doom 3 Total Conversion ‘Grimm Quest for the Gatherer’s Key’ Looks Stunning
yeah..
http://www.dsogaming.com/news/doom-3-to ... source=rss
The Happy Friar@Posted: Tue Jul 17, 2012 12:08 pm : Nice update, excited about the 8/11 release. Week after QuakeCon, eh?
This bothers me though:
BloodRayne wrote:
- I've implemented a generic system where the last player location was saved prior to a huge fall so he gets returned to his prior position (ala 'platform gameplay'). So the player doesn't die any more, resetting the map etc..
I've never liked those and never have seen them implemented where it didn't either feel like rewarding lazy play or an excuse for bad design/cheap deaths.
Very neat you did that though, did you do it via triggers the player crosses or is it 100% automatic based on fall distance?
bkt@Posted: Tue Jul 17, 2012 2:34 pm : Lookin' damn fine! All the gameplay changes sound interesting, so consider me excited to check it out!
BloodRayne@Posted: Tue Jul 17, 2012 3:29 pm : The Happy Friar wrote:
Nice update, excited about the 8/11 release. Week after QuakeCon, eh?
This bothers me though:
BloodRayne wrote:
- I've implemented a generic system where the last player location was saved prior to a huge fall so he gets returned to his prior position (ala 'platform gameplay'). So the player doesn't die any more, resetting the map etc..
I've never liked those and never have seen them implemented where it didn't either feel like rewarding lazy play or an excuse for bad design/cheap deaths.
Very neat you did that though, did you do it via triggers the player crosses or is it 100% automatic based on fall distance?
It's a feature, so you can turn it off if you want.
I did it via triggers. That's because the script can't really tell if the player should actually be transported back to their previous location, they might end up in an endless falling loop.
So there's one big trigger at the bottom of the pit, called 'func_save_player'.
At the edges of the pit you place a trigger called 'func_save_player_pos'.
It's actually pretty simple, the code itself isn't more than a few lines.
Of course, some fx were added and players lose health because of the fall.
After the third fall, a fall will be final unless the players fetch health somewhere.
7318@Posted: Tue Jul 17, 2012 7:29 pm : BloodRayne this sounds great!
I'm quite interested in the inventory system, did you ad new keys? how dod you do it? how do you use the selected item on the world?
bkt@Posted: Wed Jul 18, 2012 6:57 am : 3 strikes and your out sounds more than reasonable. A very nice sounding solution to a common problem!
The Happy Friar@Posted: Wed Jul 18, 2012 12:25 pm : Loosing life sounds a lot better.
BloodRayne@Posted: Wed Jul 18, 2012 12:37 pm : 7318 wrote:
BloodRayne this sounds great!
I'm quite interested in the inventory system, did you ad new keys? how dod you do it? how do you use the selected item on the world?
That's a short question that has a very long answer. So I'm going to keep it short.
- In the item's script I added an onSignal Event that picks up all 'touches' events. When the player touches the item, it's stored in the inventory and the global persistant arg 'Healthitems' is upped by 1, unless the max amount is already in the inventory. (stored in global persistant args.. 'setPersistantArg("healthitems") = string value)
- In ai_player.script I have a loop that's checking certain CVars (e.g. use_health), bind any key to 'use_health 1'.
- ai_player.script picks this up and immediately sets it back to 0 (sys.setcvar "use_health 0")
- Now I can decrease a global variable and use the object (e.g. execute any script commands).
There are some extra things that I do here, I've already made it so I can push variables from script to the GUI ($info_player_start1.setGuiParm) so that the GUI can show which items you have. I've opted for a quick-use item system. So there's no real inventory that users can scroll through, per se. There are just a few quick-items that users can pick up, carry and use when they want to.
bladeghost@Posted: Thu Jul 19, 2012 4:24 am : Looks Great! rayne, good stuff!
BloodRayne@Posted: Fri Jul 20, 2012 6:47 pm : Hey thanks, blade!
I'm working on a new gameplay video, should be up this weekend... if I get enough time.
BloodRayne@Posted: Sat Jul 28, 2012 12:14 pm : I've posted a new media
update over at moddb announcing HUB 2 and a new enemy, the DarkWarrior.

 Hub 2!
Grimm: Quest for the Gatherer's Key is an exploration of the idea of going 'deeper and deeper' into the realm of Purgatory. Purgatory is not really Hell, Heaven or the Purgatory you might know in the biblical sense. Also, Grimm might be far less literal than it might seem at a glimpse. It is not a logical world, rather a conglomeration of distinctive realities crossing each other. The very fabric of space between Heaven, Hell and Earth which has been distorted both in space and in time. More on that later both on the site here and in the game itself.
I have started work on Hub 2 several months ago. Before starting work on Grimm I knew that as a one man team I had to implement lots of stuff to make development easier on myself. I keep pushing the idea of 'running production', how do I make stunning maps without a lot of effort? The answer is standardisation, of course. And some tricks in fooling the player and engine. The idea was to creature textures that were all aligned, already had floor and ceiling trim added for the wall, were already aligned with added details like wood finishings. Besides the easy to use textures, which also provide the right size for walls and ceilings.
This didn't really come to fruition in the first hub (which was partly included in the first release) until the third map where I got the techniques down a bit better. You can see this for instance in the first two maps where almost each door is of a different size, each room was built from scratch and you see differences in styling between the rooms themselves. I've gone over them a couple of times to get a more standardised look and make a more cohesive whole. I've used all of these ideas about standardisation and have advanced them in the second hub, which is my first real 'standardised' hub. This gives a much more cohesive look to the rooms and the entire map, adding to the immersion.
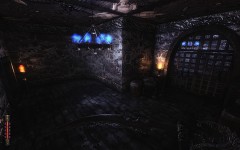
StylingEach hub in Grimm has it's own distinct style and colouring.
Where the first hub was distinctively yellow and red presenting the heat of Purgatory, the second hub is cold, presenting the icy depths of this strange world between Heaven, Hell and Earth.
Hub 2 is all about the cold and going deeper into Purgatory. The deeper that Grimm goes, the more stuck he will get and the more slow his progress will become. This is an idea that will work for the first two maps of the hub, where the last map should feel like an explosion of freedom (and release) for the player. Especially the second map should feel very claustrophobic, when Grimm gets stuck beneath parts of an underground cathedral and will have to fumble his way through dark and low catacombs to freedom, constantly working on the players feeling of getting more and more stuck the farther they go. I hope that the third map will then come as a great release, when they find freedom and enter the action and more combat based third map.
Interested in more screens?
Check out the images section!More updates and media to come soon!
bkt@Posted: Sat Jul 28, 2012 7:25 pm : The way you've described the new content makes me all warm and fuzzy inside! It's really cool to read about how your story influences the design and vice versa. That and figuring out ways to better streamline the design process is something I've been trying to do myself and am very keen to see how you've gone about it
Also, the new shots look great
BloodRayne@Posted: Sat Jul 28, 2012 10:27 pm : Thanks BKT. I'll be including the first map of the second hub in the next release!
Ivan_the_B@Posted: Tue Jul 31, 2012 9:24 pm : I really like those shots, filled with custom assets.
you, sir, are an artist!
bladeghost@Posted: Tue Jul 31, 2012 9:44 pm : I agree with everyone here , I love the blue hues, fantastic work!
BloodRayne@Posted: Tue Jul 31, 2012 10:03 pm : Thanks guys! I'm hoping to get back to it as soon as I've been relieved from a nasty toothache that's been bugging me since last week.
Every asset, except for monster animations, is custom.
Cire@Posted: Wed Aug 01, 2012 12:51 am : Looks great. Will the second release be stand-alone?
BloodRayne@Posted: Wed Aug 01, 2012 9:07 am : Hey Cire, thanks for the compliment and welcome at Doom3World.

No, next release will just be an update to the previous one including bugfixes, new maps and finished areas from the initial release.
Standalone will take a while certainly still!
Cire@Posted: Wed Aug 01, 2012 9:24 am : Thanks!
BloodRayne@Posted: Wed Aug 01, 2012 11:37 am :
The Happy Friar@Posted: Wed Aug 01, 2012 1:06 pm : Very nice pic's! I'm getting more eager for the new version. What's holdong you back on going standalone atm? Just the monster animations?
BloodRayne@Posted: Wed Aug 01, 2012 1:22 pm : Mostly that. I've got about 80% 'vanilla free', that was just a bit of monk's work. But the anims are a pain. To get them right is just plain difficult, there's just no fun in rigging and animating the monsters. I tolerate having to UV map them, do it amateurishly and make up for it by faking a lot or obscuring bad stuff. Perhaps when the maps are done (these have prio 1 a.t.m.) and all the work-load is defined I might 'hire' an animator to just re-animate all the stuff I've used from Doom3 in a more suitable manner for the game.
chimueloeldragon2011@Posted: Wed Aug 01, 2012 3:27 pm : Hey BloodRayne, this is looking really cool. Those shots definately look stuning!
As for fresnel:
VFP FILE:
Code:
!!ARBvp1.0
OPTION ARB_position_invariant;
TEMP R1, R2, R3, R4;
SUB R1, program.env[5], vertex.position;
DP3 R2, R1, R1;
RSQ R2, R2.x;
MUL R1, R1, R2.x;
DP3 R2, R1, vertex.normal;
SUB R3, 1.0, R2;
MUL R4, R3, R3;
MUL R4, R4, R3;
MUL R4, R4, R3;
MUL R4, R4, R3;
SUB R3, 1.0, program.local[0];
MAD result.texcoord[2].x, R4, R3, program.local[0];
END
!!ARBfp1.0
OPTION ARB_precision_hint_fastest;
TEMP A, C;
MUL A, fragment.position, program.env[1];
TEX C, A, texture[0], 2D;
MOV result.color, C;
MOV result.color.a, fragment.texcoord[2].x;
END
Material, you can either use it separately as a layer or mix it with your own materials and use it as a stage. I'm doing this and it works. You know even more than I do though so I don't need to explain anything
Code:
textures/common/reflection_fresnel
{
noSelfShadow
noshadows
translucent
nonsolid
noimpact
qer_editorimage textures/common/reflection
// The reflection itself
{
mirrorRenderMap 256 256
blend blend
alpha 0.05
translate 0.5, 0.5
scale 0.5, 0.5
program fresnel.vfp
vertexParm 0 .0200593122
fragmentMap 0 _scratch
}
}

Sikkpin@Posted: Wed Aug 01, 2012 3:31 pm : Is this the kind of ice shader you're looking for?


BloodRayne@Posted: Wed Aug 01, 2012 5:09 pm : YES. That's exactly the kind of stuff I'm looking for.
I'd make it darker and more gritty but that's the stuff!
Thanks chimueloeldragon2011 and sikk!
Sikk, where can I find that prog?
don't tell me it's already in Sikkmod... lol
chimueloeldragon2011@Posted: Wed Aug 01, 2012 7:43 pm : That seems to be from prey isn't it? It uses idtech 4 so I think one of the vets out there could port it into d3, if that has not been done already. Btw, Glad you found it useful!
BloodRayne@Posted: Thu Aug 02, 2012 12:11 pm : Yup you can spot it from the model.
Sikkpin@Posted: Thu Aug 02, 2012 3:39 pm : Yeah, that shader's for Prey. Give me a little bit and I'll get a D3 version for you with example material and textures.
BloodRayne@Posted: Thu Aug 02, 2012 3:42 pm : That would be great, take your time.
Sikkpin@Posted: Fri Aug 03, 2012 9:22 pm : How are you wanting your ice to behave? Do you want it translucent or opaque? What kind of control would you want exposed through the material? Or, better yet, if you don't want to over-complicate things, a screenshot of what you want it to look like would be helpful. The shader I wrote for Prey was done specifically for the freeze gun effect which was only used on enemy models and might not look good on large flat surfaces like if used for an ice layer on level geometry or for terrain.
BloodRayne@Posted: Fri Aug 03, 2012 10:44 pm : I'm searching for an effect I can combine with a colored layer.
It should add self illumination based on fresnel/perpendicular occlusion, e.g. the edges are lighted more than the center, based on the viewers angle.
(Don't ask me the specifics, I just know what it does and what it's called)..
Foremost, like this:

And this:
http://www.theresilientearth.com/files/ ... esheet.jpgAnd this:
http://naturalwallpaper.net/wp-content/ ... -cavex.jpgAnd this:
http://desktopwallpaper-s.com/wallpaper ... Alaska.jpg(not sure if that last link will work, seems like a fishy site)
BNA!@Posted: Sat Aug 04, 2012 12:01 am : Isn't this similar to sub surface scattering?
BloodRayne@Posted: Sat Aug 04, 2012 9:15 am : Yes, but I think sub-surface scattering is more advanced and used for human skin and such.
I believe fresnel is much more easy to achieve. It basically dampens lighting based on viewangles, I believe.
BNA!@Posted: Sat Aug 04, 2012 9:21 am : BloodRayne wrote:
Yes, but I think sub-surface scattering is more advanced and used for human skin and such.
I believe fresnel is much more easy to achieve. It basically dampens lighting based on viewangles, I believe.
That's true, I fondly remember sss to get viewed as the semi-holy-grail of rendering in 2002 (semi-holy as in widely available, but hard to compute with resources at hand).
bkt@Posted: Sat Aug 04, 2012 10:27 am : BNA! wrote:
Isn't this similar to sub surface scattering?
Which sikk has already got working in d3 if I remember correctly?
bkt@Posted: Sat Aug 04, 2012 10:27 am :
bkt wrote:
BNA! wrote:
Isn't this similar to sub surface scattering?
Which sikk has already working in d3 if I remember correctly?
BloodRayne@Posted: Sat Aug 04, 2012 2:53 pm : It's stuff like this that's always a little unsettling. Here I am, minding my own business, imagining what purgatory/hell might look like.
I finish up my map, BSP it and here's the endresult:

I am superstitious, so I'm going back in to add another cluster lol.
Sikkpin@Posted: Sat Aug 04, 2012 9:15 pm : Here you go. If you have any questions about the parameters or you want any modifications, let me know. Shader, material and non-Doom 3 textures included. It's an opaque surface and the shader is quite simple so it can be used liberally. The screenshot doesn't do it justice so be sure to check it out in real time

.

BloodRayne@Posted: Sat Aug 04, 2012 9:28 pm : Ahhh great! Really gorgeous. Going to work it in right away.

bladeghost@Posted: Sat Aug 04, 2012 9:42 pm : wow that's really cool, no pun there... as I have a heck of a time just making a decent sheet of glass. very very nice!
Sikkpin@Posted: Sat Aug 04, 2012 10:52 pm : There's a slight fuck up in the shader I included in the rar. I was doing the parallax effect in the wrong space. Hardly noticeable but still incorrect so you'll want to use the shader below. Sorry about that.
Code:
!!ARBvp1.0
OPTION ARB_position_invariant;
# input:
#-----------------------------------------
# texcoord[0] = TEX0 texcoords
# attrib[9] = tangent[0]
# attrib[10] = tangent[1]
# attrib[11] = normal
#
# env[5] = localViewOrigin
# env[6] = modelMatrix[0]
# env[7] = modelMatrix[1]
# env[8] = modelMatrix[2]
#
# local[0] = detail scale, detail strength
# local[1] = height scale, height bias, refraction strength, Fresnel exponent
# local[2] = reflection color
# local[3] = refraction color
#
# output:
#-----------------------------------------
# texCoord[0] = normal/detail map texcoord
# texCoord[1] = surface tangent to global coordiantes, w = world view vec X
# texCoord[2] = surface bitangent to global coordiantes, w = world view vec Y
# texCoord[3] = surface normal to global coordiantes, w = world view vec Z
# texCoord[4] = tangent-space view vector
# texCoord[5] = height scale, detail strength, refraction strength, Fresnel exponent
# texCoord[6] = reflection color
# texCoord[7] = refraction color
PARAM vec = { 1.0, 0.0, 0.0, 1.0 };
PARAM iceParms = program.local[0];
PARAM iceParms2 = program.local[1];
TEMP R0, R1;
# surface texture coordinates
MOV R0, 1.0;
MOV R0.zw, iceParms.x;
MUL result.texcoord[0], vertex.texcoord[0].xyxy, R0;
# tangent space -> world space conversion matrix
DP3 result.texcoord[1].x, vertex.attrib[9], program.env[6];
DP3 result.texcoord[1].y, vertex.attrib[10], program.env[6];
DP3 result.texcoord[1].z, vertex.normal, program.env[6];
DP3 result.texcoord[2].x, vertex.attrib[9], program.env[7];
DP3 result.texcoord[2].y, vertex.attrib[10], program.env[7];
DP3 result.texcoord[2].z, vertex.normal, program.env[7];
DP3 result.texcoord[3].x, vertex.attrib[9], program.env[8];
DP3 result.texcoord[3].y, vertex.attrib[10], program.env[8];
DP3 result.texcoord[3].z, vertex.normal, program.env[8];
# transform view vector to world-space
ADD R0, program.env[5], -vertex.position;
DP3 result.texcoord[1].w, R0, program.env[6];
DP3 result.texcoord[2].w, R0, program.env[7];
DP3 result.texcoord[3].w, R0, program.env[8];
# transform view vector to tangent-space
DP3 result.texcoord[4].x, R0, vertex.attrib[9];
DP3 result.texcoord[4].y, R0, vertex.attrib[10];
DP3 result.texcoord[4].z, R0, vertex.normal;
# deform magnitude and scales it by the projection distance
MOV R0, vec;
DP4 R0.z, vertex.position, state.matrix.modelview.row[2];
DP4 R1.x, R0, state.matrix.projection.row[0];
DP4 R1.y, R0, state.matrix.projection.row[3];
# don't let the recip get near zero for polygons that cross the view plane
MAX R1.y, R1.y, 1.0;
RCP R1.y, R1.y;
MUL R1.x, R1.x, R1.y;
# clamp the distance so the deformations don't get too wacky near the view
MIN R1.x, R1.x, 0.02;
# ice parameters
MOV result.texcoord[5].x, iceParms.y;
MOV result.texcoord[5].y, iceParms2.x;
MUL result.texcoord[5].z, R1.x, iceParms2.y;
MOV result.texcoord[5].w, iceParms2.z;
# reflection color
MOV result.texcoord[6], program.local[2];
# refraction color
MOV result.texcoord[7], program.local[3];
END
#==================================================================================
!!ARBfp1.0
OPTION ARB_precision_hint_fastest;
# texture 0 = surface normal map
# texture 1 = surface detail normal map
# texture 2 = reflection map
# texture 3 = refraction map
# texture 4 = Fresnel color shift map
#
# env[0] = 1.0 to _currentRender conversion
# env[1] = fragment.position to 0.0 - 1.0 conversion
OUTPUT oColor = result.color;
ATTRIB fPos = fragment.position;
ATTRIB TC = fragment.texcoord[0];
ATTRIB tangent = fragment.texcoord[1];
ATTRIB bitangent = fragment.texcoord[2];
ATTRIB normal = fragment.texcoord[3];
ATTRIB viewVecTC = fragment.texcoord[4];
ATTRIB iceParms = fragment.texcoord[5];
ATTRIB reflectCol = fragment.texcoord[6];
ATTRIB refractCol = fragment.texcoord[7];
PARAM nonPoT = program.env[0];
PARAM invRes = program.env[1];
TEMP uv, viewVec, wViewVec, normalVec, wNormalVec, reflectVec;
TEMP NdotV, color, diffuse, specular, fresnel, detail;
TEMP R0, R1;
# load the normal map and scale to -1.0<->1.0 range
TEX normalVec, TC, texture[0], 2D;
MAD normalVec, normalVec.wyzx, 2.0, -1.0;
# load the detail normal map and scale to -1.0<->1.0 range
TEX detail, TC.zwzw, texture[1], 2D;
MAD detail, detail.wyzx, 2.0, -1.0;
# add detail normal
MAD normalVec.xy, detail, iceParms.x, normalVec;
# transform the surface normal by the local tangent space
DP3 wNormalVec.x, normalVec, tangent;
DP3 wNormalVec.y, normalVec, bitangent;
DP3 wNormalVec.z, normalVec, normal;
# normalize world-space normal vector
DP3 wNormalVec.w, wNormalVec, wNormalVec;
RSQ wNormalVec.w, wNormalVec.w;
MUL wNormalVec.xyz, wNormalVec, wNormalVec.w;
# normalize the world-space view vector
MOV wViewVec.x, tangent.w;
MOV wViewVec.y, bitangent.w;
MOV wViewVec.z, normal.w;
DP3 wViewVec.w, wViewVec, wViewVec;
RSQ wViewVec.w, wViewVec.w;
MUL wViewVec.xyz, wViewVec, wViewVec.w;
# normalize the tangent-space view vector
DP3 viewVec.w, viewVecTC, viewVecTC;
RSQ viewVec.w, viewVec.w;
MUL viewVec.xyz, viewVecTC, viewVec.w;
# calculate Fresnel
DP3 NdotV, wNormalVec, wViewVec;
ADD_SAT NdotV.y, 1.0, -NdotV;
POW_SAT fresnel, NdotV.y, iceParms.w;
# calculate specular
MUL reflectVec, NdotV.x, wNormalVec;
MAD reflectVec.xyz, reflectVec, 2.0, -wViewVec;
TEX specular, reflectVec, texture[2], CUBE;
LRP specular, fresnel, reflectCol, specular;
# calculate sub-surface diffuse
TEX R1, TC, texture[3], 2D;
ADD R1.w, 1.0, -R1.w;
MUL R1.w, R1.w, -iceParms.y;
MAD R1.xy, R1.w, viewVec.xyxy, TC;
MAD R1.xy, iceParms.z, normalVec.xyxy, R1;
TEX diffuse, R1, texture[3], 2D;
MAD diffuse.x, diffuse.x, 0.9, 0.05;
MOV diffuse.y, 0.5;
TEX diffuse.xyz, diffuse, texture[4], 2D;
MUL diffuse.xyz, diffuse, refractCol;
# add diffuse and specular and output
ADD oColor.xyz, diffuse, specular;
END
BloodRayne@Posted: Mon Aug 06, 2012 7:33 pm : I've implemented it into my own testmap but I'm getting some weird results, let me know if you need more info (and what kind!
)
[edit: never mind I f3ked up]
[edit2: ok I f3ked up, fixed it but still have a weird issue..
]
It works but it seems very bright, anything I can do to tone that down?
Code:
textures/vincere/sikk_ice
{
noShadows
noSelfShadow
qer_editorimage textures/vincere/vin_rock1_d.tga
{
program ice.vfp
vertexparm 0 16, 0.1 // detail scale, detail strength
vertexparm 1 0.15, 4.0, 3.0 // height scale, refraction strength, Fresnel exponent
vertexparm 2 0.5, 0.5, 0.56, 1.0 // reflection color
vertexparm 3 0.6, 0.6, 0.66, 1.0 // refraction color
fragmentmap 0 textures/vincere/vin_rock1_d.tga // surface normal map
fragmentmap 1 textures/vincere/ice/detail1.tga // surface detail normal map
fragmentmap 2 cubeMap env/vin_gen1 // reflection map (this is about twice as dark as the vanilla gen1)
fragmentmap 3 textures/vincere/ice/perlin_noise // refraction map (needs height map in alpha)
fragmentmap 4 textures/vincere/ice/ice_gradient // Fresnel color shift map
}
}
Attachment:
 vin_rock1_d.jpg [ 152.38 KB | Viewed 56 times ]
Attachment:
 shot00124.jpg [ 253.94 KB | Viewed 60 times ]
Sikkpin@Posted: Mon Aug 06, 2012 7:53 pm : Looks like you're using a diffuse texture instead of a normal map for texture 0.
BloodRayne@Posted: Mon Aug 06, 2012 8:13 pm : Yup, I'm a dumbass, thanks!
Ok it looks better now, but still very bright, anyway to tone it down more? Or is there still something wrong with the shader?
Attachment:
 shot00126.jpg [ 252.92 KB | Viewed 73 times ]
Sikkpin@Posted: Mon Aug 06, 2012 8:56 pm : Try using darker colors for these:
Code:
vertexparm 2 0.5, 0.5, 0.56, 1.0 // reflection color
vertexparm 3 0.6, 0.6, 0.66, 1.0 // refraction color
Also, disable ldr bloom if you're using it in conjunction with the hdr bloom. That's essentially double the bloom and the ldr one doesn't give a shit about adapted luminance or thresholds.
BloodRayne@Posted: Mon Aug 06, 2012 9:29 pm : Yes, now it's behaving exactly the way I want it to.
Attachment:
 shot.jpg [ 313.08 KB | Viewed 94 times ]
I would like to request one more functionality for it, though..
This would be even better if I could add a mask layer to it (where black would be invisible, white would be fully visible and anything in between) so I could also add this effect as ice decals to the walls and certain objects. I could also make variants on the material for a more frozen snow effect.
Attachment:
 Frozenwall2.jpg [ 42.59 KB | Viewed 68 times ]
bladeghost@Posted: Tue Aug 07, 2012 2:34 am : for textures that get that 'add diffuse to make it bright in the .MTR , what I've done is just un-brighten the texture in photoshop by reducing its brightness and it will light up properly after once darkened.. in short just make your lit texture darker and it seems to balance out. I haven't seen a variable for that but that seems to be a good working method. example: the holo table in my mod needs to be seeable not blinding... so just by darknening the texture when its 'lit in the materials with the 'add line, that can be something to consider, my observation while working on things like that at times... thought I'd share that.
bladeghost@Posted: Tue Aug 07, 2012 2:39 am : BloodRayne wrote:
Yes, now it's behaving exactly the way I want it to.
yikes, that ice could look better, some spikes maybe? as it was formed with gravity? icy stalagtites perhaps, just a suggestion....cool stuff! yeah man!

BloodRayne@Posted: Tue Aug 07, 2012 9:25 am : bladeghost wrote:
for textures that get that 'add diffuse to make it bright in the .MTR , what I've done is just un-brighten the texture in photoshop by reducing its brightness and it will light up properly after once darkened.. in short just make your lit texture darker and it seems to balance out. I haven't seen a variable for that but that seems to be a good working method. example: the holo table in my mod needs to be seeable not blinding... so just by darknening the texture when its 'lit in the materials with the 'add line, that can be something to consider, my observation while working on things like that at times... thought I'd share that.
This is an opaque shader so if I place it as a decal over e.g. a wall then it will completely obscure the wall.
I want to make the walls look 'frozen' by using this shader in abundance as a decal, meaning I need to have a translucent mask I can add to it so the textures below it will shine through.
ps: That's just a testmodel and testmap lol!

marcelus@Posted: Tue Aug 07, 2012 10:27 am : very nice mod. I started to play yesterday. Great music and great gameplay. Maybe the game could be in some parts a little lighter but it is irrelevant. Looking forward to the second hub
BloodRayne@Posted: Tue Aug 07, 2012 11:14 am : Thanks, marcelus.
This Sunday I'll be releasing an update to the game with many new assets, updates and an extra map so look out for that.
BloodRayne@Posted: Sat Aug 11, 2012 7:38 pm : The second release is shaping up nicely. I'm currently in last minute play-testing and debugging with no real issues so far. Meaning... the release is ready for tomorrow, planned and ready to go!
Most of the work is currently going into testing the balance between difficulty modes and sniffing out small stuff like z-fighting in areas etc..etc.. Then late tonight it will be a matter of creating the final release, package and upload it then hope that MODDB approves it as soon as possible!
Are you ready?
bkt@Posted: Sun Aug 12, 2012 4:09 am : Hell to the yeah!


