This tutorial presumes you have some minimum knowledge of the map editor in DOOM 3. If you don't, please take a moment to see the many tutorials available on this topic, specially BNA!'s Your first box map tutorial and the DOOM 3 level editing FAQ on how to properly set up the editor.
Complete GUI Scripting - 5: Applying a GUI script to a map
One of the most powerful features of GUI scripting in the DOOM 3 engine is the ability to apply your GUI script to an in-game object, giving the player the ability to interact with it in the game world itself, without opening outside dialog windows.
Adding GUI scripts to in-game objects is pretty easy. For this tutorial, I've created a simple 'kitchen' map to place our cake status reporter panel. This is a rather crude copy & paste job from the original DOOM 3 singleplayer maps, so please bare since I don't have that much of an experience in the DOOM 3 map editor.
Well, first of all, you'll have to download the source files for this tutorial, since the map we use is inside of it. Open the zip, put all *.map files on the <doom3>/base/maps folder, and put all the rest in the <doom3>/base/guis/cakestatus folder.
Something to take notice is that, since I've changed the location of our "cakestatus" script from /base/cakestatus to /base/guis/cakestatus, all material references had to be changed too. So I changed the GUI script and cakestatus3.gui is different from the cakestatus2.gui file we used on the previous lesson. This is, however, just a hack job to get us going. On real, serious mod works, it'd better to have your GUIs on /guis and your assets somewhere else, all correctly distributed.
Back to the topic. Run the map editor and open up our map - kitchen.map.

This is pretty much your default kitchen. It has a refrigerator, and that's where the UAC personnel puts the dangerous UAC cake, so we need to put the cake status reporter panel next to it. First, we have to add a new model that will display our panel.
Press ESC to deselect everything, right-click on the editor area, and select "New Model...". On the window that pops up, find a model to place on the map - not all models will do, though, so we need models that are prepared to have a GUI entity. Navigate to the "base > models > mapobjects > guiobjects" folder - anyone from there will do. I used "flatmonitor > flatmonitor.lwo", which is a large, flat panel you can put on the wall.

After pressing OK, the object is ready to be moved. Move it by dragging the model or rotate it by using the "Selection > Rotate" menu until you find a position that it fits well.
That done, we're ready to get the panel working. With the model selected, be sure to have the "entity" tab opened in the 'property' window. There are many options, but we won't be dealing with them.

On the entity window, press the "Gui..." button to select a GUI that will be placed on the panel. On the window that pops up, navigate to the "base > guis > cakestatus" folder, and sure enough, select the "cakestatus3" GUI script.

Easy enough, it's already working on our preview window, if you have the render window enabled (if you don't, press F3 to enable it, then F4 or F7 to put on the lights).

Select the BSP > BSP menu to compile it, make sure it has no leaks, then press F2 to open it in-game. As soon as the game runs, if it kicks you to the console (it does for me), type "map kitchen" to run the map.
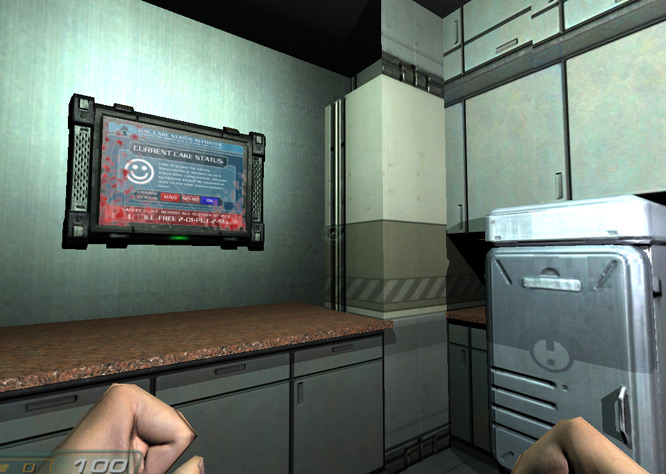
I think the cake is bad...

...or maybe I'll just say it's good so somebody will eat it and die.

Let's have a final look in our kitchen. It's a pretty big panel, nobody will miss it. And hopefully, the world will be a better place... thank to UAC cake status reporting technology.
Well, that's pretty much it - this lesson is just about applying a GUI script to a model anyways. There's much more that could be said about interaction between GUIs and levels, but it's out of the scope of this lesson. I'd like to thanks Njal for this tutorial that helped me write mine, and point it out for people that are looking for a bit more serious level control with GUIs.
Download source and example files (544kb)