This tutorial starts the HUD series, where we'll implement a new HUD from start to finish. For those who doesn't know, HUD stands for "Heads Up Display", and it's what you see on top of the game renderings when you're playing the game: it's the health, ammo, armor, and other displays that inform the player his status. Well, we'll be creating a new HUD from scratch, and while we'll be applying it to the singleplayer game for ease sampling, it's the same concept that's used on multiplayer HUDs. Also, we'll create a new correctly set MOD in your DOOM 3 game.
Complete GUI Scripting - 6: Creating a new HUD GUI
The HUD is arguably the most important GUI element on any FPS modification; it's with what the user will have to interact with during most of his time with the game, and it needs to be used fast during crucial times (at the heat of a battle, a look at the 'health' meter must be possible in the easiest and fastest way possible).
There are two basic ways you can create a new HUD for your DOOM 3 modification. You can use the built-in HUD script and modify a few things to adapt it to your needs, or create a new one from scratch.
While it can be considered overkill in some cases - you have to re-add several features that are already built-in - creating a HUD from scratch is the right way when you are creating a new gametype that won't benefit from assets included in the default HUD. A racing game, for example, would require a brand new HUD script - a standard capture the flag game wouldn't, you would just need to add the flag stats somewhere on the default one.
In order to better broaden the possibilities for future modifications, we'll be building one from the start. Also, I won't use the built-in GUI editor for that; while using the editor would be good for creating the first raw sketches and assembling visual assets, it's just not efficient enough to test a HUD script. We'll, rather, edit the script on any text editor (notepad will do) and test it in-game, in a near-real time.
Set up us the MOD
The first step is to create a new MOD to be used by the DOOM 3 engine. Of course, a MOD or modification is something that adds new features to the original game, or replaces some of the standard content. Each MOD uses a separate workspace, and while you might try to combine mods (by putting all the files in the same place), this is usually a bad idea. We'll create a correct MOD workspace.
Look on your DOOM 3 folder. You'll probably see different files and subdirectories. In any case, this is what a standard installation of the game will look like:

The "/base" directory contains all the main game data; likewise, MOD directories would be a sibling of this base directory and be located at the same dir.
The first step is setting up a mod is to create a new directory for our MOD; so browse to the DOOM 3 directory and create a new folder; we'll name this new folder 'classichud' (that's the example I'll use for our tutorial-built HUD; more on this later on).
This is how a standard DOOM 3 directory will look like after this 'classichud' directory has been created.

With that, our mod directory is ready to go.
Adding assets to the MOD directory
We're ready to add content to out mod. We have to create assets for our 'classichud' mod in its folder -- those assets that will replace the standard game ones. Browse to the folder you just created, and we'll create a new folder, called 'guis'.

Since we will create new versions of the standard assets (a new HUD script to replace the default one), we need to be sure to place them on the correct location - the same used in DOOM 3's original paks. In DOOM 3, the singleplayer HUD is always the GUI script at <doom3>/<mod-dir>/guis/hud.gui, so that's what we need to create.
Open up notepad (or your text editor of choice), create a new empty document, and immediately save it as "<doom 3>/classichud/guis/hud.gui" -- the HUD script we'll work with.

Now, with this file still opened, let's create the base of our HUD. First, we'll create a simple test template. Type this on GUI script source.
Code:
windowDef Desktop {
rect 0,0,640,480
visible 1
noevents 1
nocursor 1
windowDef test {
rect 10, 10, 100, 100
text "test"
font "fonts/english"
}
}
rect 0,0,640,480
visible 1
noevents 1
nocursor 1
windowDef test {
rect 10, 10, 100, 100
text "test"
font "fonts/english"
}
}
Pretty much self-explanatory; a simple GUI script with an text windowDef that'll allow us to test if it's working. With this dummy in place, it's time for us to finally test it in game.
Launch DOOM
Keep the document still open. Now, there are two ways we can run MODs on the DOOM 3 engine: one, using a command-line argument, and two, setting up the mod and selecting it from the "Mods" menu in the game.
Calling it from the mods menu would require us to create a PK4 package (which is just a ZIP file with a different extension), so we'll instead opt for the fast choice and create a command-line argument that'll call the game running our mod. To do that, create a new shortcut to the DOOM 3 game (duplicate your original shortcut create by the game installer) and change the "target" field of the shortcut to be sure it's running the game with these parameters:
Code:
<your path>\Doom3.exe +seta r_mode 3 +set r_fullscreen 0 +set fs_game classichud +map game/mp/d3dm1
What this code will do is: run the game on mode 3 (640x480), windowed, using the "classichud" mod dir, and open the map d3dm1 (Tomiko Reactor) as default. It'll be pretty handy to test the HUD script this way.
After changing those shortcuts settings, run the game to check on your HUD at work.
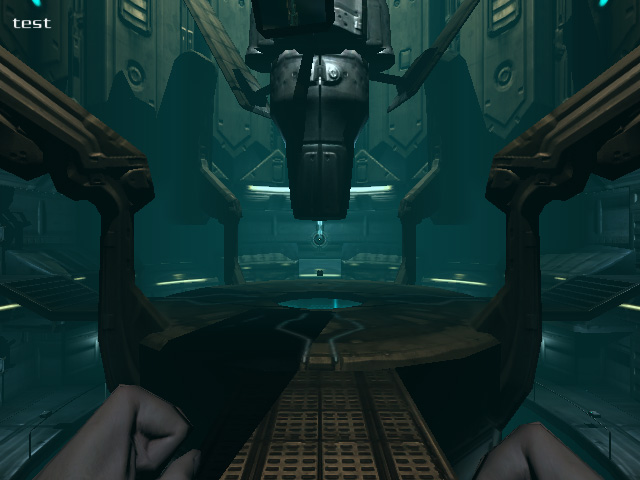
Okey! It's working or what? The original HUD is gone, and we have our lone 'test' windowDef sitting at the top left corner of the screen.
Now, here's the handy thing: alt+tab to your script editing program, and change the "test" string on the windowDef to anything you like. Hell, even change the location of the windowDef. Here's what I've done to it.
Code:
windowDef Desktop {
rect 0,0,640,480
visible 1
noevents 1
nocursor 1
windowDef test {
rect 10, 100, 640, 460
text "HELLO."
textalign 1
textscale 1.6
font "fonts/english"
}
}
rect 0,0,640,480
visible 1
noevents 1
nocursor 1
windowDef test {
rect 10, 100, 640, 460
text "HELLO."
textalign 1
textscale 1.6
font "fonts/english"
}
}
Now, save it, alt+tab back to DOOM 3, pull down the console, and type this:
Code:
reloadguis
Pull the console back up, and voila.

So, without reloading anything, it's easy to test the HUD in-game right after you change it, in almost-near real time. Can't get much better than that. This is how we'll create and test the HUD in the next few lessons.
This pretty much wraps up this introductory tutorial. In the next ones we'll get our hands dirty and implement a real HUD - the classic DOOM 1 HUD, with bleeding marine face and all that. See you there.
Download source and example files (1kb)